 By Dave King
Affiliate disclosure. Some links on this page are affiliate links. If you buy through them I may earn a small commission, at no extra cost to you. It never changes what I recommend.
You have a GoHighLevel account, you know funnels are supposed to be the point, and the dashboard is not exactly waving a flag that says “start here.” If you have been clicking around trying to figure out how to create funnels in GoHighLevel without accidentally breaking something, this is the guide you needed on day one.
By the end of this walkthrough, you will have a live funnel on a custom domain, at least one page built and published, and a workflow ready to handle every form submission. If you do not have an account yet, start a free trial here before continuing.
This guide assumes you are logged into GoHighLevel and have a domain either already connected or available to add. No prior funnel experience needed.
This is for anyone with a GoHighLevel account who wants to build their first funnel. It assumes you are logged in and have a domain available to connect, or are happy to test on a GoHighLevel subdomain for now. No prior funnel experience needed.
If the interface has changed since this date, use the product’s own menus or help documentation to find the equivalent option.
To create a funnel in GoHighLevel, go to Sites, open the Funnels tab, click New Funnel, and choose your starting method. Add your funnel steps, build each page in the drag-and-drop editor, connect your domain in the funnel settings, and publish.
- Three ways to start: from a template, from scratch, or using Funnel AI.
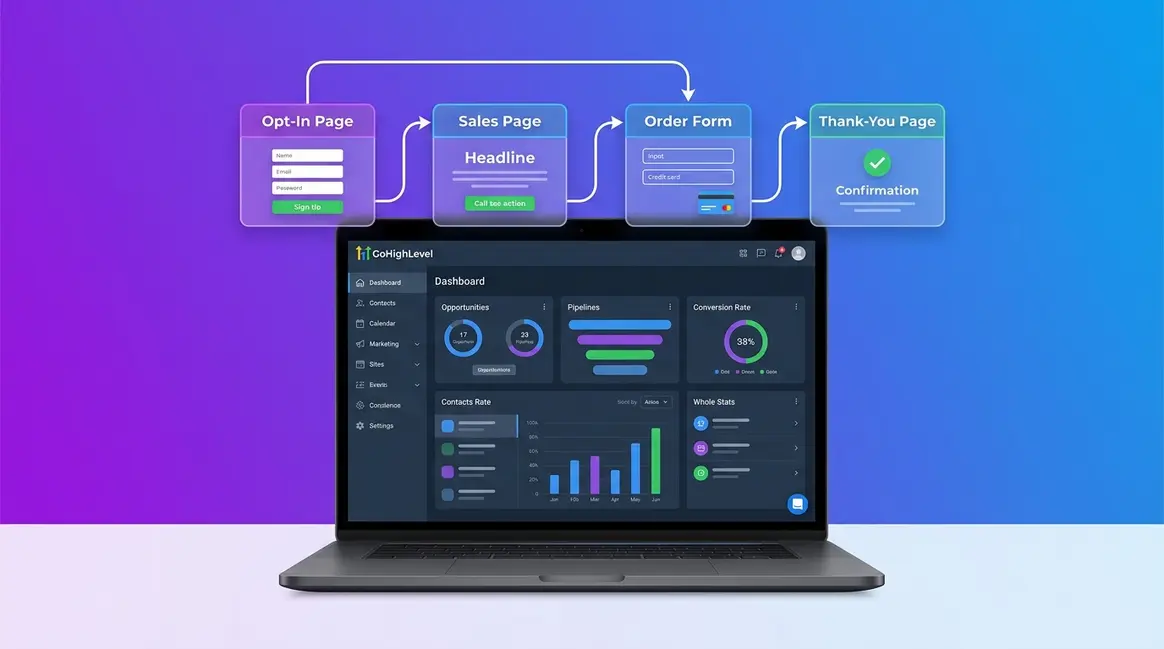
- Funnel steps: each step is one page (opt-in, sales page, thank you page).
- Domain connection: set this in the funnel Settings tab before you publish.
- After you go live: connect a workflow so every form submission triggers a follow-up.
From a template
GoHighLevel has a library of pre-built funnel templates covering common use cases from lead generation to webinar registration. Starting from a template is the fastest path to a styled, structured funnel you can customise rather than build from a blank canvas. Funnel AI sits alongside this and generates a structure and copy from a short prompt, which is worth a look if nothing in the library fits. When I set up lead generation funnels for Carden Digital, I nearly always start from a template and swap out the copy and colours.
From scratch
Starting blank gives you full control over layout and structure from the first element. Choose this if you have a specific design in mind that no template comes close to matching.
What’s in this guide
How I Create a Funnel in GoHighLevel
Get to the Funnels area
From the left sidebar, click Sites. Then open the Funnels tab along the top of the page. Click the green New Funnel button, or the + icon depending on your current view. You will see three options: choose from template, start blank, or use Funnel AI.
Click path: Sites – Funnels – New Funnel
Pick your method and name your funnel
Select your preferred method from the options shown. Give the funnel a clear name, one you will still recognise in a list of ten others three months from now. Click Create, and GoHighLevel will open the funnel steps panel where the build begins.
Add your funnel steps
A funnel step is one page in the sequence, for example an opt-in page, a thank you page, a sales page, or an order form. Click Add New Step. Name the step, choose the step type from the dropdown, and set the path, which is the URL slug that will appear after your domain for that page. Most simple funnels need two steps: one to capture the lead and one to confirm or sell. Drag steps up or down to reorder them at any point.
Build your pages in the editor
Click the pencil icon on any step to open the page builder. The builder is organised into Sections (full-width containers), Rows (which divide a section into columns), and Elements (text, image, form, button, calendar, and more) that drop into those columns. To add an element, click the + button inside a row and select it from the panel on the left.
For a lead generation funnel, you need at minimum a headline element, a form element, and a button element on the opt-in step. Once the page is taking shape, click the mobile icon in the top toolbar to switch to mobile view and check the layout before saving. Click Save when done, return to the steps panel, and repeat for each step.
For NextTier MSP, I treat the mobile view check as non-negotiable. Most leads arrive on phones, and a layout that looks clean on desktop can be unreadable at 375px without a quick adjustment.
Connect your domain and publish
Go back to the funnel steps panel and click the Settings tab at the top of the funnel editor. In the Domain dropdown, select the domain you want to use. If no domain appears in the list, you need to add it first under the main sidebar navigation, then return here.
Click path for adding a domain: Settings – Domains – Add New Domain
Fill in the SEO Meta Title and Meta Description fields for each step. This takes a couple of minutes and is worth doing before you go live. Set each step to Published using the toggle next to it, and your funnel is live.
How I Handle Products and Payments
Products must be created before you can attach them to a funnel. Go to Payments in the left sidebar, then Products, and click New Product. Fill in the name, price, and product type. The product will then be available to select inside your order form element settings.
Connect your payment gateway under Payments – Integrations. GoHighLevel connects to Stripe; follow the on-screen authorisation flow to link your account. The official Stripe documentation on checkout flows covers what happens on Stripe’s side if you need it.
Once the gateway is connected, open your order-form funnel step in the builder. Add an Order Form element from the elements panel, either the 1-step or 2-step variant. Select your product from the element settings on the left. Across Carden IT Services and Carden Digital, I use the 2-step order form for anything beyond a simple low-ticket offer, since it captures the lead email on the first screen before asking for payment details.
For a full breakdown of how payments, invoices, and subscriptions work in GoHighLevel, my review covers it in detail.
How I Connect the Automation After Launch
A workflow trigger is the event that starts an automation. For a funnel, the trigger you want is Form Submitted. In Automations, create a new workflow, set the trigger to Form Submitted, and select the specific form from your funnel step rather than leaving it set to All Forms.
Common actions to add after the trigger: Send Email (a confirmation to the lead), Send SMS (if you collected a phone number), Add Tag (to segment contacts by funnel source), and Update Opportunity (to move them into the right pipeline stage). For a full walkthrough of the workflow builder, see how to build your first GoHighLevel workflow.
If you are managing funnels across client sub-accounts, the Agency Pro trial gives you the sub-account structure to keep each client’s data separate.
Your funnel is listed under Sites – Funnels with at least one step showing a Published badge. Clicking your domain URL loads the first page. Submitting the test form creates a new contact in your GoHighLevel CRM under Contacts.
- Custom domain connected and verified in funnel Settings
- All funnel steps toggled to Published
- SEO meta title and description filled in on every step
- Mobile view checked in the page builder for each page
- Form element linked to at least one workflow trigger
- Payment gateway connected and test transaction completed (if selling)
- End-to-end test submission completed and contact appeared in CRM
QWhat is a GoHighLevel funnel and how does it work?
A GoHighLevel funnel is a series of linked pages designed to move a visitor toward one action, such as opting in or buying. Each page is a funnel step. GoHighLevel handles the hosting, the form submissions, and the CRM contact creation. You connect it to a workflow to automate the follow-up.
QHow do I create my own funnel in GoHighLevel?
Go to Sites – Funnels – New Funnel. Choose a template, a blank canvas, or Funnel AI. Add your steps (opt-in, thank you page, or order form), build each page in the drag-and-drop editor, connect your domain in the funnel Settings tab, and publish each step.
QHow many steps does a funnel need?
Most simple lead generation funnels need two: one page to capture the lead and one to confirm. Add a third only if you are selling and need an order form or an upsell. You can drag steps into a different order at any point without rebuilding them.
QDo I need a custom domain to publish a funnel?
No. GoHighLevel will serve the funnel on its own subdomain. I would still connect a custom domain before sharing the link with anyone, because a gohighlevel.com address looks unfinished. Add the domain first, then select it in the funnel Settings tab.
QDo I have to publish every funnel step separately?
Yes. Each step has its own Published toggle in the steps panel. A step left unpublished will not load for a visitor, even when the domain is connected and the rest of the funnel is live. Check every toggle before you share the link.
QCan I take payments directly on a funnel page?
Yes. Create the product under Payments, connect your gateway, then add an Order Form element to the relevant funnel step and select the product in the element settings. The 1-step form takes everything on one screen, the 2-step captures the email first.
Want this set up properly?
If you would rather hand the funnel build to someone who has done it across multiple businesses, get in touch.